Identity the Acid/Base


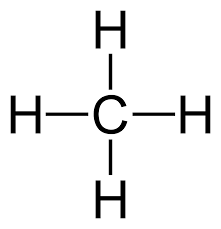
I was very busy with my internship in the morning and missed a lot of classes especially the lab. However, I got to understand and caught up with some of the Acid/Base and pH/POH explanation. Here is one of the lab that I did. It is an experiment where we are trying to discover which solution is the acid and which one is the base.

Acid/Base Scientific Explanation Lab

Objective: The goal of this activity is to collect enough data to make a claim as to which of the 3 unknown solutions are acids.  You must perform at least 3 tests to ensure proper data to make a solid claim.  Once you have collected your data you will write a scientific explanation as to which solutions are acids.    In a section labeled objective, write down the goal of this lab.

Materials:  

  • solutions A, B, C in dropper bottles
  • well plates to place solutions
  • Red litmus paper
  • phenolphthalein
  • bromothymol blue indicator  (turns yellow for acids, green for neutral, blue for bases)

Procedure:

  1. Solution A# must have 10 ml in a block
  2. Repeat 1# two more times
  3. Add one drop of Phenolphthalein to the first block and stir
  4. Take Lip must paper and dip in the second block
  5. Add one drop of Bromothymol and stir
  6. Wait and see the reaction
  7. Repeat #1 to #6 procedure again on #B and #C solutions

Continue reading “Identity the Acid/Base”

Let’s Shape the Molecules

Why does the molecule shape important?

The molecule is very important in terms of size and shape because each characterizes different function in cells.

VSEPR Model: Use to predict the shapes and angles of the molecule using their “pair electrons that surround the central molecules”

VSEPR for Lewis Structure: Valance electron, Skeleton, Electron, Pairs of bond, Review formal charge

Example: H2O

Valance electron: H2 = 1 x 2 = 2, O = 6, Sum of both valance electron is 8

Skeleton: = 2 electrons or we call it pair bond sharing between the molecule, HOH

Electron: Check it whether each molecule satisfy with their electron, Ex: H has 2 (share with O), which it is satisfying because it has the same outer shell like Helium

Pairs of bond: Check the structure whether it has more than one pair bond to share

Review Formal charge: To check all of the molecules, whether they satisfy their own needs or forget to create other pairs of bond

VSEPR for: Valance-Shell Electron-Pair Repulsion

Two bonded pairs:

Linear: only two bonded pair, 180o, non-polar

Bend: 2 bonded and 1 lone pair/s, <120o, polar

Trigonal planar: if only 3 bonded pairs, 120o, non-polar

Trigonal pyramidal- 3 bonded but also a lone pair, <109.5o, Polar

Tetrahedral: If only 4 bonded pairs, 109.5o, non-polar

See-saw: If 4 bonded and 1 lone pair, <900 and <1200, non-polar

Trigonal bipyramidal: If five bonded pairs, 900 and 1200, non-polar

Octahedral: If six bonded pairs, 900, non-polar

Example: SiS2


  • Lewis Structure
  • Check the lone pair/s electron
  • Identify the shape
  • Add the angle
  • Polar/non-polar


  • There are no lone pairs
  • Linear
  • 1800
  • Non-polar

Resources: https://www.youtube.com/watch?v=xNYiB_2u8J4


Flame Experiment

Chemistry Class

Why does the fire change its color? Are we putting the food color on the fire or gasoline to create colors flame?

The answer is NO.

The colors are changing because of the electrons get “excited” and produces the energy for the electrons to jump into different orbits and “fall back” to the ground. The photon that produces by those energy creates the wavelength that shows different colors on the flame.

To understand more about the flame, we did the experiments to see the quantitative and qualitative as the observation of the idea.

Flame Test Lap:

Materials:

Safety goggles, wood splints, tongs/tweezers, Bunsen burner, test tubes with various compounds

Safety:

  1. Safety goggles must be worn at all times
  2. Many of these salts are toxic. If you come into contact with any of the compounds make sure to notify the teacher and wash the contacted area thoroughly. Wash your hands before leaving the lab!

Procedure:

  1. Light the Bunsen burner (turn the gas on so you can just hear it, then use the striker)
  2. Place the wood splint for each compound into the flame using tongs or tweezers- ONE AT A TIME!
  3. Take note of the color of the flame and return the wood splint to the solution.
  4. CLEAN UP YOUR STATION! Carefully put the stoppers back on the solutions! Make sure the station looks like it did when you started! Let me know if you need new splints!
  5. Wash your hands thoroughly before leaving the laboratory

This is my report to the experiment